
Section 6. Conducting Your Phone Survey
This section explains how easy it is to conduct an over-the-phone survey with SurveyGold. It explains how to contact or call back a known respondent. It also shows you how to enter responses and comments from a known respondent.
The Conduct Survey tab folder is the place to conduct phone-based surveys. Survey responses may be entered by a surveyor:
Productivity Note: The Print Blank Survey Form button is located here as a convenient way to print a survey questionnaire. This can help you to familiarize yourself with the survey, particularly if you are conducting a survey that you did not write.
The steps involved in conducting a questionnaire-based survey are as follows:
Tap or click images to enlarge them.
- Entering responses from a respondent while interviewing them over the phone
- Transcribing responses from a completed paper survey questionnaire where the surveyor recorded responses via paper
Productivity Note: The Print Blank Survey Form button is located here as a convenient way to print a survey questionnaire. This can help you to familiarize yourself with the survey, particularly if you are conducting a survey that you did not write.
The steps involved in conducting a questionnaire-based survey are as follows:
- Setup your survey
- Associated known respondents with your survey
- Select a known respondent record
- Attempt to contact a known respondent
- If necessary, schedule a return phone call
- Verify respondent information
- Ask questions and enter responses
- Conclude survey
Tap or click images to enlarge them.
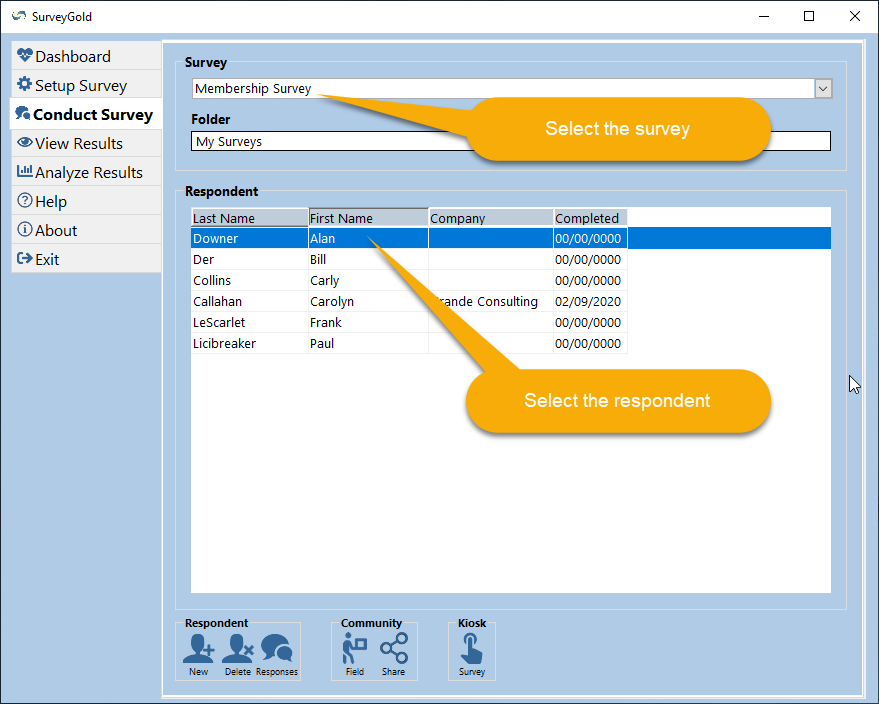
Selecting a Known Respondent
You can add a new respondent at the very time you are enter responses from their completed paper questionnaire or via in-person interview.
You can add a new respondent at the very time you are enter responses from their completed paper questionnaire or via in-person interview.
|
Step 1 - From the Conduct Survey tab folder, select your survey. Then select a respondent.
|
|
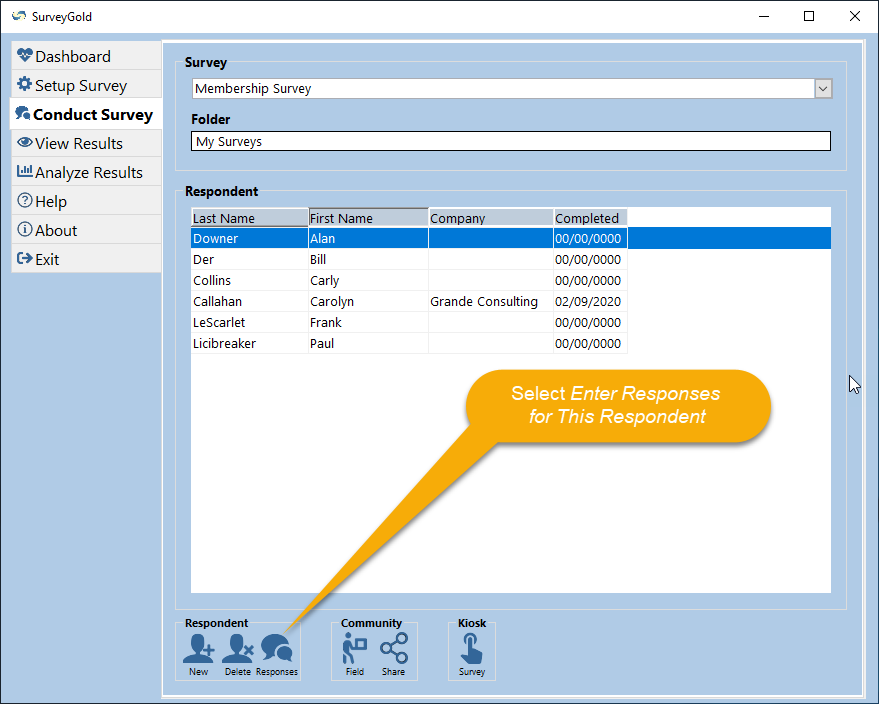
Step 2 - Select Enter Responses for This Respondent to begin entering respondent data and/or survey responses.
|
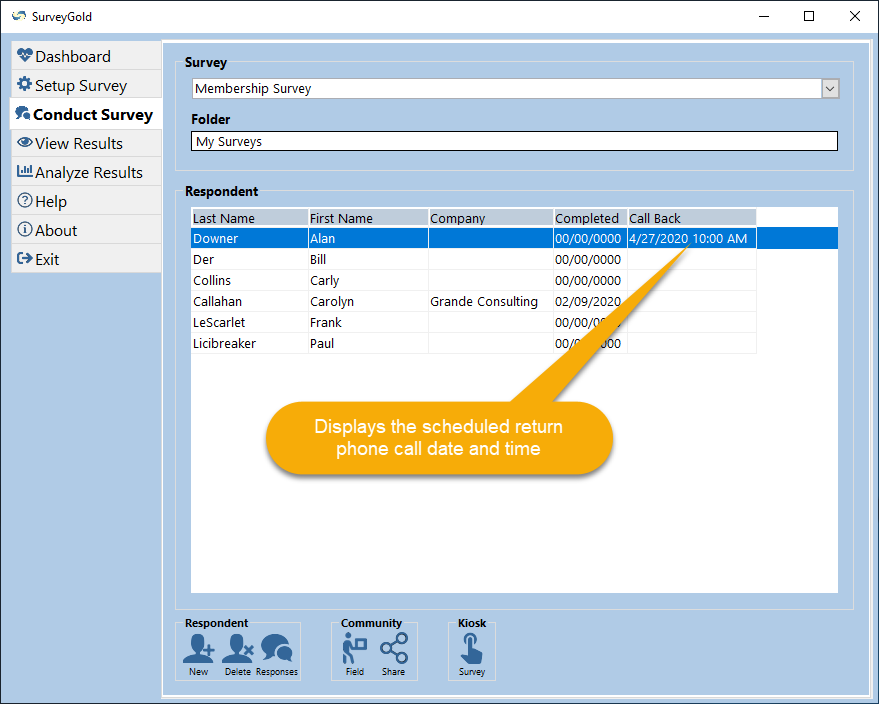
Scheduling a Return Phone Call
When selecting a known respondent, the first thing to do is to attempt to contact them via a telephone call. In the event that your are unable to reach the respondent, or you reach them and it is not a convenient time, you may elect to schedule a return phone call.
When selecting a known respondent, the first thing to do is to attempt to contact them via a telephone call. In the event that your are unable to reach the respondent, or you reach them and it is not a convenient time, you may elect to schedule a return phone call.

|
Step 1 - Select the Call Respondent tab. Enter a callback date and time. Enter any relevant notes to provide continuity in the return phone call. Select Back in the tool bar.
|
|
Step 2 - Control is returned to the Conduct Survey tab folder. Notice that the scheduled callback date and time are listed next to the respondent's name.
Productivity Note: The return call date and time is displayed in the Call Back column next to the respondent. You can select this column to sort your return calls. |
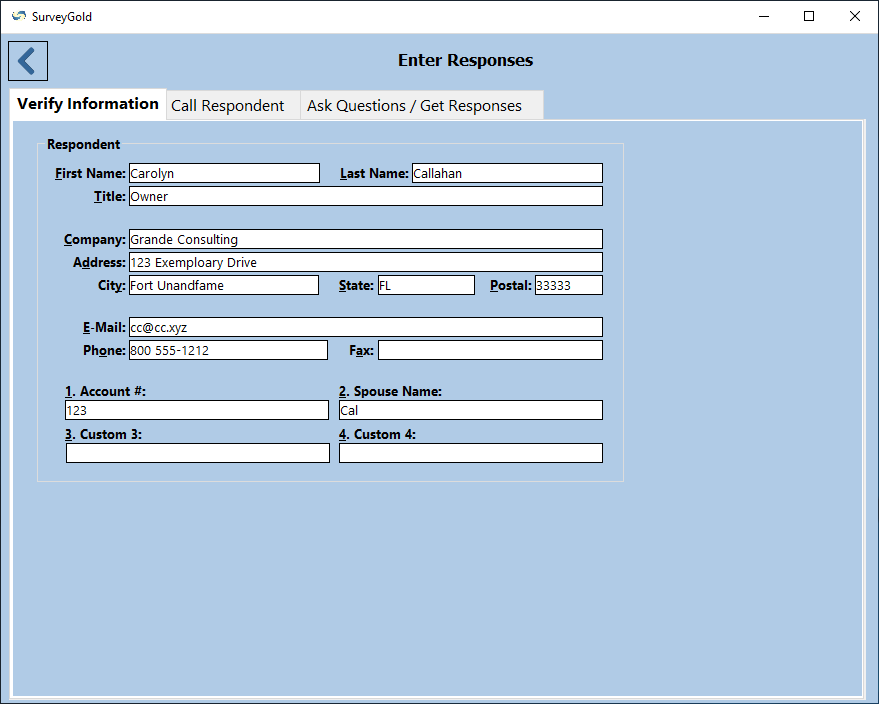
Verifying Respondent Information
When the respondent is ready to conduct the phone interview, the first thing you will want to do is verify their name and contact information. This takes only a moment and is invaluable in terms of follow-up potential.
When the respondent is ready to conduct the phone interview, the first thing you will want to do is verify their name and contact information. This takes only a moment and is invaluable in terms of follow-up potential.
|
Step 1 - Select the Verify Information tab. Ask the respondent to verify their contact information including the spelling of their name. Enter any information in the appropriate section.
|
Asking Questions and Entering Responses
The Ask Question / Enter Responses tab is divided into three distinct areas to facilitate viewing the question, getting responses and capturing any noteworthy comments.
Note: The three areas can be re-sized by using the sliders between each area. This can help you to see an entire lengthy question or a large set of choices.
|
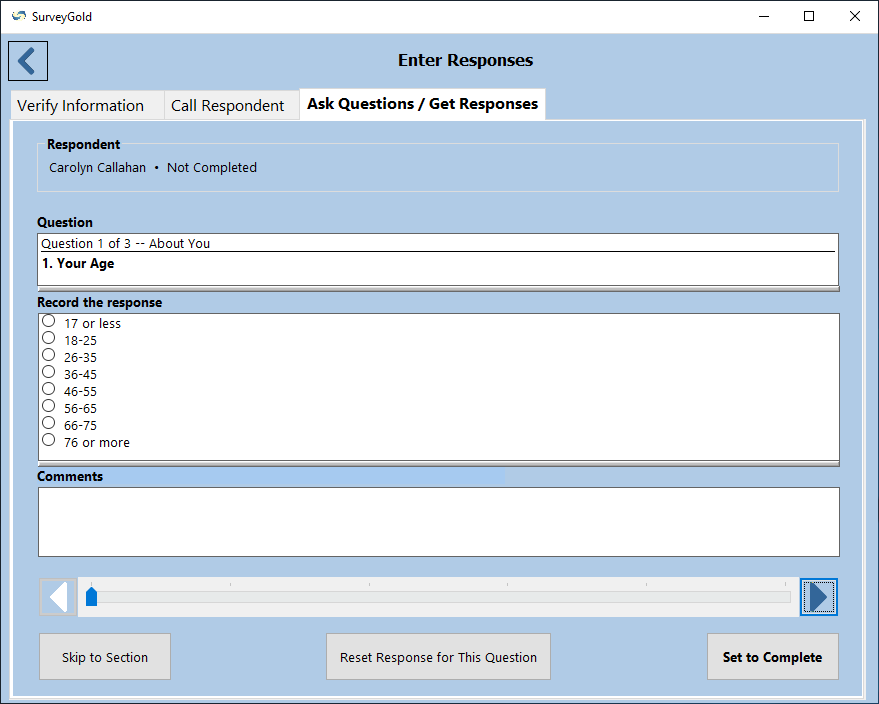
Step 1 - Select the question. The first question in the survey is automatically selected. If you are conducting an in-person interview, simply read the question aloud.
Note: Question responses are optional. If a respondent chooses not to respond to a question, press Return to advance to the next question. |
|
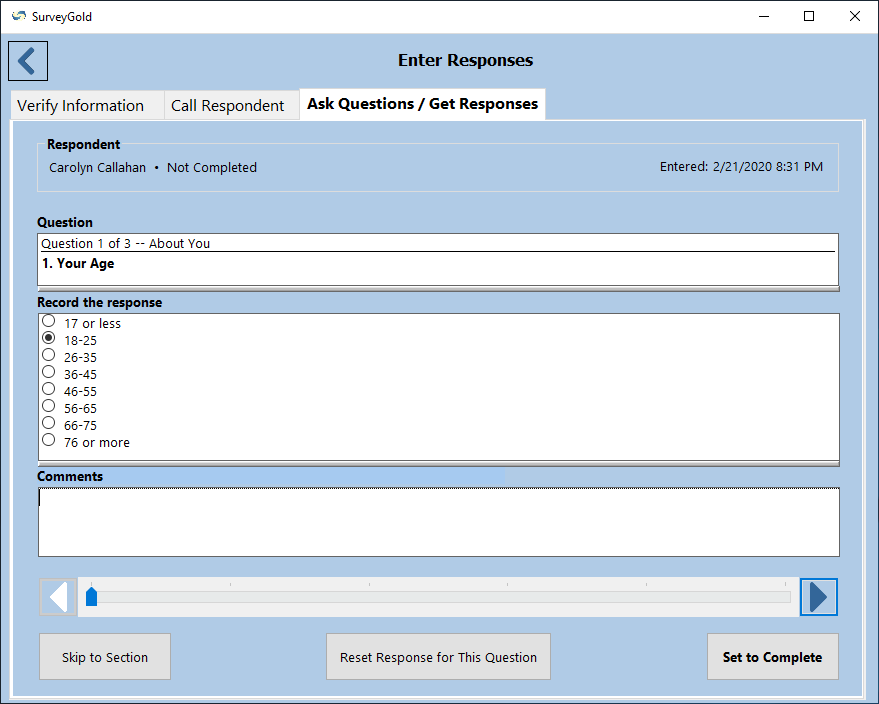
Step 2 - If a response is provided, enter it in the Record the Response prompt.
Note: The format of the Record the Response prompt varies depending upon two factors. The first factor is whether or not response choices were defined when the survey was setup. The second factor is whether one response is allowed or more than one response is allowed as defined when the survey was setup. Productivity Note: Most questions can be answered by selecting the appropriate response. Some require you to type the response. When multiple responses are allowed and no choices exist, press TAB on your keyboard to insert a new response. |
|
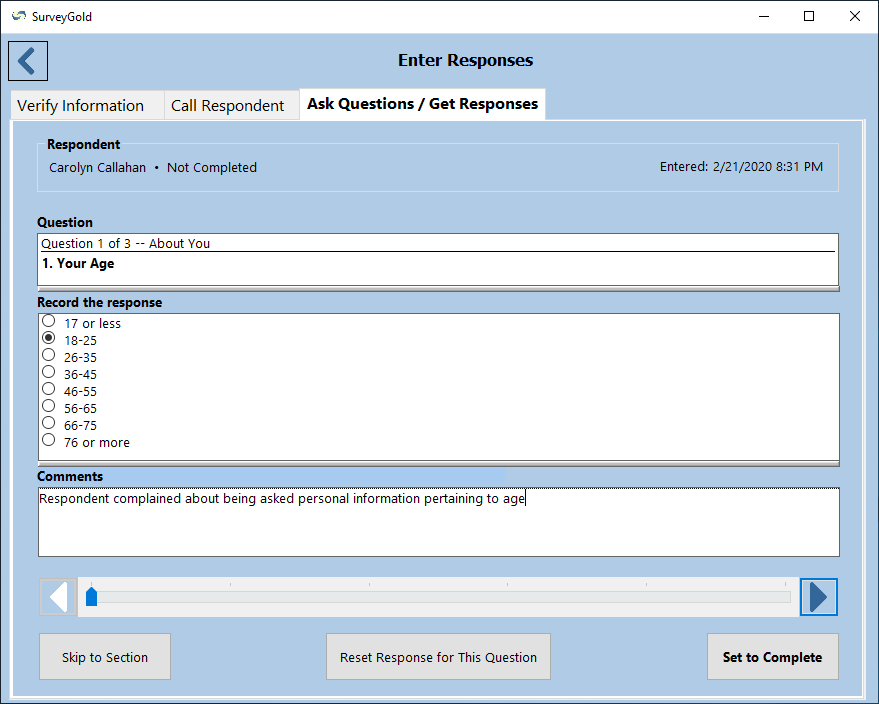
Step 3 (Optional) - Enter any comments provided by the respondent in the Comments prompt. The surveyor may also choose to enter clarifying comments as deemed appropriate. Comments are valuable. Comments are visible when reviewing survey results.
Productivity Note: When you specify a response in Step 2, the mouse pointer automatically moves to the Comments prompt. |
|
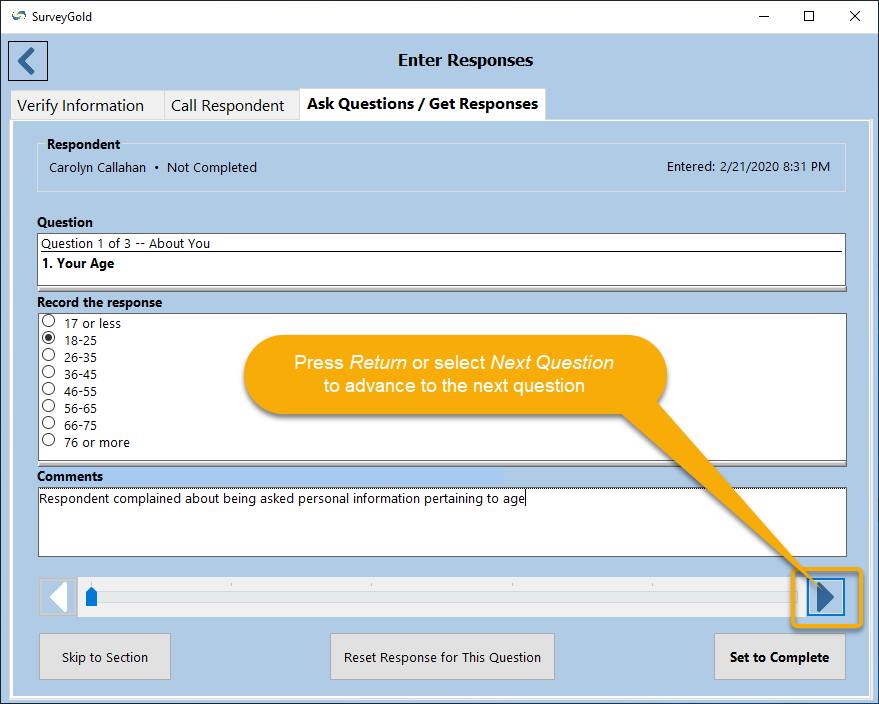
Step 4 - Press Return on your keyboard or select Next Question to advance to the next question. Normally this is the next sequential question in survey. However, in some cases the next question may be further into the survey, skipping over some questions, depending upon the response given. SurveyGold automatically determines which question to advance to based on the how the survey was setup.
Productivity Note: SurveyGold was designed to minimize the time needed to enter a response. If you are right-handed, it may prove helpful for you to place your right hand on the mouse and your left hand on the Return key on your keyboard (and vice versa if you are left-handed.) With your hands in this configuration, you can quickly and easily select a response and press Return. |
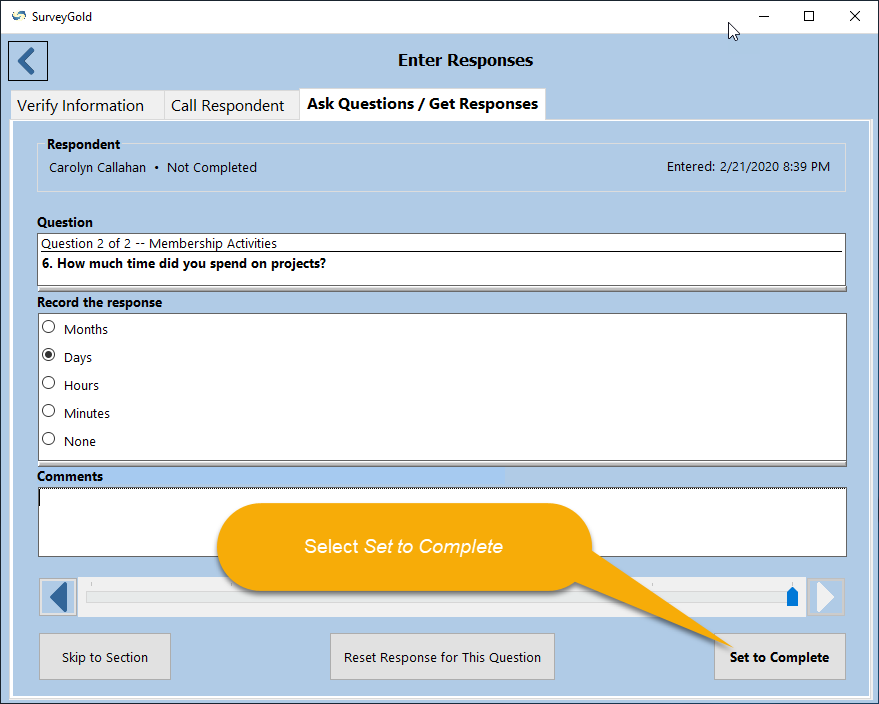
Concluding the Survey
The final step in conducting your survey is to conclude the survey. A respondent may choose to finish responding to questions at any point in the questionnaire.
The final step in conducting your survey is to conclude the survey. A respondent may choose to finish responding to questions at any point in the questionnaire.
|
Step 1 - When the last question response is provided by the respondent, select Set to Complete.
|

|
Step 2 - This returns you to the Conduct Survey tab folder where the respondent is Date Completed is automatically recorded and marks the respondent as having completed the survey. Now you can select Create New Respondent for This Survey or select an existing respondent to enter another respondent's responses if you desire.
Note: SurveyGold determines the Date Completed based upon the date and time when the Set to Complete action was selected. If you would like to be able to override this date and time when you select Conclude Survey, you can set this as an application preference as follows:
|